Here is the finished coffee set, ready to dry and get terra sig. I like the decreasing cup sizes with the cars, but I'm not sold on how the decoration works on the coffee pot. I'm wondering as well about the top section of the teapot body and the bottom section of the cups - both are currently bare clay. Does that need something else??
I'm excited to keep playing with this sort of concept, but I think it's going to take a few goes to get it right. I do find myself missing the visual interest of some of my earlier plates that had areas of stencils, painting and scraffito - I like the building up and layering of the surface.
Lots to think about - it's probably time to consult the sketchbook!
Monday, January 19, 2009
Sunday, January 18, 2009
Mmmmm...
Following the trend of some other potters out there in the blog-o-sphere, I thought I'd include one of my latest baked creations. I have a passion for food (a trait I'm sure many of you out there share!) and I love to bake in particular. I'm a huge fan of Tom Grey's posts that merge his love of cooking and food with ceramics and am excited to try out the delicious looking recipe recently posted by John Britt. It's always interesting to get a glimpse into the lives of artists outside of their art, so here is what I spent a lovely, snowy, Sunday afternoon doing!
Have a great week...
Wednesday, January 14, 2009
Set up and working!
I got my last table up to the studio this week, put on a fresh covering of canvas (heaven!) and got a little more shelving in place. I'm now to the point where I'm getting some work done, slowly but surely. It's amazing with regular hours in the studio how aware I've become of my tortoise working pace. But, I know what I want things to look like and the physical act of making is a large part of why I'm a potter. There are times though when I'm tempted to crank out a shelf full of pots just to make sure I still can!
Above is a shot of my latest creation - a coffee pot. I've got the form done but a good deal of decorating left to deal with. The coffee pot is going to be oil themed (hence the barrels as a knob) and it will have four accompanying cups that have cars - one with a hummer, one with an suv, one with a mid-sized car, and one with a smart car. The cups will decrease in size according with their gas consumption. I've got a lot of ideas for this type of coffee set - I'm excited to keep experimenting.
Saturday, January 10, 2009
Paper Resist
Awhile back, someone had asked me about my paper resist process. Now that I'm all settled and making work again (!!) I thought I'd go ahead and post about this technique.
I'm currently trying to find a material that I could resue rather than these single use paper stencils. It is such a drain on my time to have to cut these for each piece I make, but I really like the way they look. I need something that will stick to the surface but not break down with water. Any ideas??
The photo above shows one of my drawings that I've begin to cut. I tend to cut the interior spaces first before cutting the outline of the shape, which gives the delicate areas a little more support. Using a fresh blade also makes cutting go much more smoothly. I typically layer a number of sheets beneath the original image so I get multiples each time I cut since these are quite time consuming!
Here you see the finished stencils - I just use our scrap paper from the recycle bin. I have noticed that different papers respond differently to moisture. Some separate, which makes it difficult to peel up the stencil after wetting (you'll see an example of this in a later image)...
I'm going to stencil some juice cups with the car stencil above. This stencil was cut using the same method as the oil rig.
I have now applied the stencil and am ready for the top slip coat. Before placing the stencil, I painted an area of the cup with black underglaze (I use amaco velvet underglaze) and then position the dry stencil. To wet the paper, I spray it using a spray bottle with a fine mist. It is important to remove any air bubbles and to check the edges to make sure they have adhered well to the surface. Timing is key here. You don't want to see wet areas on the surface of the cup, but you also don't want the stencil to become dry (otherwise it will begin to release from the piece). I tend to apply my underglaze, put the stencil right on and wet it, pat with a sponge to remove excess water and then immediately apply my overcoat.
Here you see the white slip applied over the stencil. I use a deflocculated slip and apply it with a brush. I remove the stencil as soon as the surface of the slip loses it's sheen - they tend to stick less that way. Some people leave them until the paper begins to dry and pull away from the surface, but I'm not that patient!
And the finished pair of cups! If you look at the cup on the right, you can see where the stencil didn't come off very cleanly. As long as the top coat of white slip is removed, this paper residue should just burn off in the firing...
I'm currently trying to find a material that I could resue rather than these single use paper stencils. It is such a drain on my time to have to cut these for each piece I make, but I really like the way they look. I need something that will stick to the surface but not break down with water. Any ideas??
Sunday, January 4, 2009
Moving In!
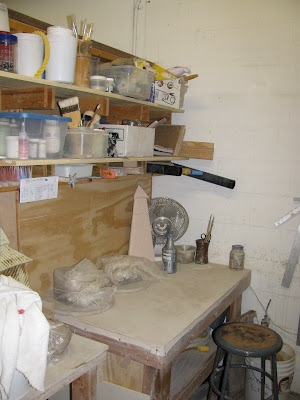
I finally got to start moving into my new studio space today - yippie! I still don't think that I've fully absorbed the fact that I have a studio yet, but the more I moved things around and got settled, the more giddy I became. One of the things I'm most excited about? I will no longer have to schlep tools and pots back and forth between home and studio. What a treat that will be! I've attached some pictures of my progress in the space, now it looks like it needs some pots!
Thursday, January 1, 2009
Happy New Year!!
The passing of another year always comes as such a surprise to me - it was just summer like last week, how could it already be January?!? But, 2009 is only one day in and already off to a good start. I've posted pictures of my new studio space at the Northern Clay Center (still full of the previous occupants work). I'm hoping to start moving in tomorrow and to start working with clay on Monday. The thought of being part of a group of people doing such great clay work is thrilling and scary all rolled into one. I've certainly got a lot of things to explore from the glaze chemistry class and am anxious to get things moving again after nearly a month away from the studio. I'll be sure to post images as I put my own stamp on this little space and get things rolling again. One of my *many* resolutions this year is to try to post on this blog at least once a week - here's to week one of 2009!
I hope that everyone had a wonderful first day of 2009 - I am looking forward to all of the wonderful pots I'm sure I will see on the plethora of blogs out there.
Happy New Year!
I hope that everyone had a wonderful first day of 2009 - I am looking forward to all of the wonderful pots I'm sure I will see on the plethora of blogs out there.
Happy New Year!
Subscribe to:
Posts (Atom)